
If you’re a Python developer curious about Django, you’re in the right place. Django is a high-level web framework designed to help you build web applications quickly and cleanly. In this guide, I’ll go through the basics, show you how to install Django, and create your first project and app.
Takeaways from This Post
- Understand the core structure of a Django project and its components.
- Learn how to install Django and set up a project using best practices like virtual environments.
- Know how to create and structure a Django app, including models, views, and admin configuration.
- Be able to run the Django development server and access your application in a browser.
- Gain confidence in taking the next steps to build more complex Django applications.
What is Django? How does it works?
Django is a powerful web framework that follows the Model-View-Template (MVT) architectural pattern, which is similar to the Model-View-Controller (MVC) pattern but adapted for Django’s ecosystem. In the MVT pattern:
- Model: Represents the database structure and handles data. It interacts with the database through Django’s ORM (Object-Relational Mapper).
- View: Contains the logic for handling user requests and generating responses. Views often fetch data from the model and pass it to the template.
- Template: Defines the presentation layer. Templates render the dynamic data received from views into HTML for the user.

The flow of a Django request works as follows:
- A user sends a HTTP request to the Django application (e.g., by visiting a URL).
- The request is routed through Django’s Middleware (Handling sessions, auth, CSRF, etc.) and URL dispatcher (
urls.py), which matches the URL pattern to a specific view. - The view processes the request, interacting with the models (
models.py) to fetch or save data. - The view passes the data to a template, which formats it into a response (usually HTML).
- Django sends the rendered response back to the user.
Step 1: Installing Django
Before you start, ensure you have Python installed on your machine. For this tutorial, you will need:
- Minimum Python Version: 3.8
- Minimum Django Version: 4.0
This guide has been tested using Python 3.10.11 and Django 5.1.5 on a Windows environment.
1.1 You can check if Python is installed by running:
python --versionIf Python is not installed, download it from python.org.
1.2 Next, create a virtual environment to keep your project dependencies organized. Using a virtual environment allows you to isolate the libraries and dependencies for your Django project, avoiding conflicts with other Python projects on your system. This ensures your project remains stable and makes it easier to share or deploy. For more details about virtual environment, please read Avoid Version Conflicts in Python with venv.
python -m venv firstDjango
cd firstDjango\Scripts\
activate.bat
1.3 Then, you can install Django using pip
pip install django1.4 After installation, you can verify it.
python -m django --versionStep 2: Creating Your First Django Project
A Django project is essentially a collection of settings and configurations for your web application.
2.1 Run the following command to create a new project, and navigate to the project folder:
django-admin startproject myproject
cd myproject
The following folders and files will be created
myproject/
    manage.py
    myproject/
        __init__.py
        settings.py
        urls.py
        asgi.py
wsgi.py- manage.py: A command-line utility to interact with your project (e.g., run the server, create apps).
- myproject/: A directory containing your project settings.
- settings.py: Configuration file for your project.
- urls.py: Defines URL routes.
- asgi.py and wsgi.py: Entry points for serving your application.
Step 3: Creating Your First Django App
In Django, an app is a modular piece of your project that handles specific functionality. A single Django project can contain multiple apps, each responsible for a distinct feature or functionality. For example, you might create separate apps for user authentication, blog posts, or an e-commerce cart system.
Advantages of Using Multiple Apps
- Modularity: Each app is self-contained, making it easier to develop and maintain different features independently.
- Reusability: Apps can be reused across multiple projects. For example, you can reuse a custom authentication app in different Django projects.
- Scalability: By organizing functionality into separate apps, your project becomes easier to scale and extend.
3.1 Run the following command inside your project directory to create a new app:
python manage.py startapp tasksCheck the structure of the new app:
tasks/
    migrations/
        __init__.py
    __init__.py
    admin.py
    apps.py
    models.py
    tests.py
    views.py
Key Files in the App:
- models.py: Define your database models here.
- views.py: Write the logic for what happens when a user interacts with your app.
- admin.py: Customize how your models appear in the Django admin.
- apps.py: Configuration for your app.
3.2 Add your app to the project’s settings. Open myproject/settings.py and include the app name in the INSTALLED_APPS list:
INSTALLED_APPS = [
    'django.contrib.admin',
    'django.contrib.auth',
    'django.contrib.contenttypes',
    'django.contrib.sessions',
    'django.contrib.messages',
    'django.contrib.staticfiles',
    'tasks',  # Add your app here
]
3.3 Run the development server:
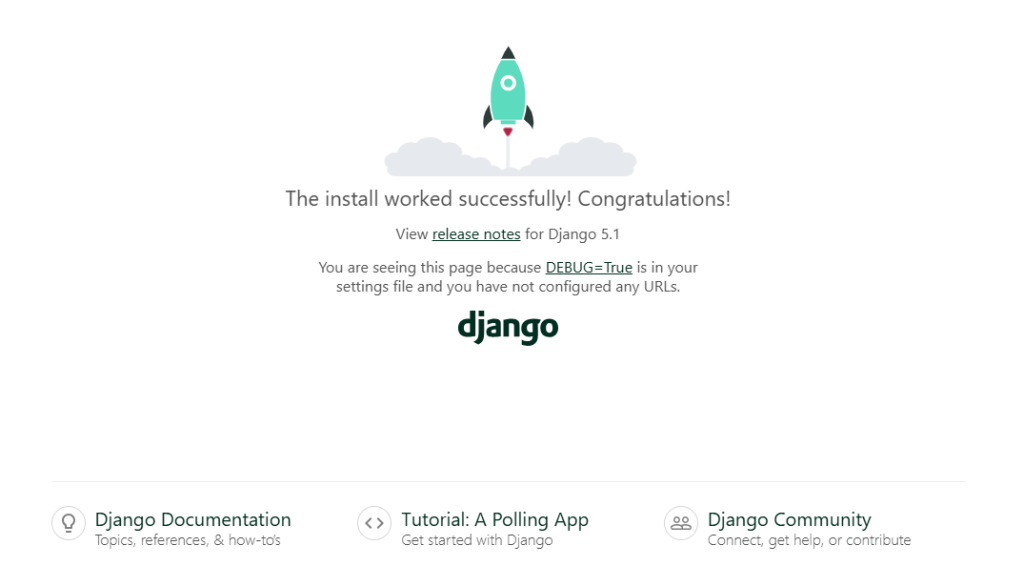
python manage.py runserverOpen your browser and go to http://127.0.0.1:8000/. You should see the Django welcome page.
Step 4: Let’s extend the tasks app
4.1 Open tasks/models.py and define a simple model for a task:
from django.db import models

class Task(models.Model):
    title = models.CharField(max_length=255)
    completed = models.BooleanField(default=False)

    def __str__(self):
return self.titletitle: A string field to hold the task’s title.completed: A boolean field to indicate if the task is completed.
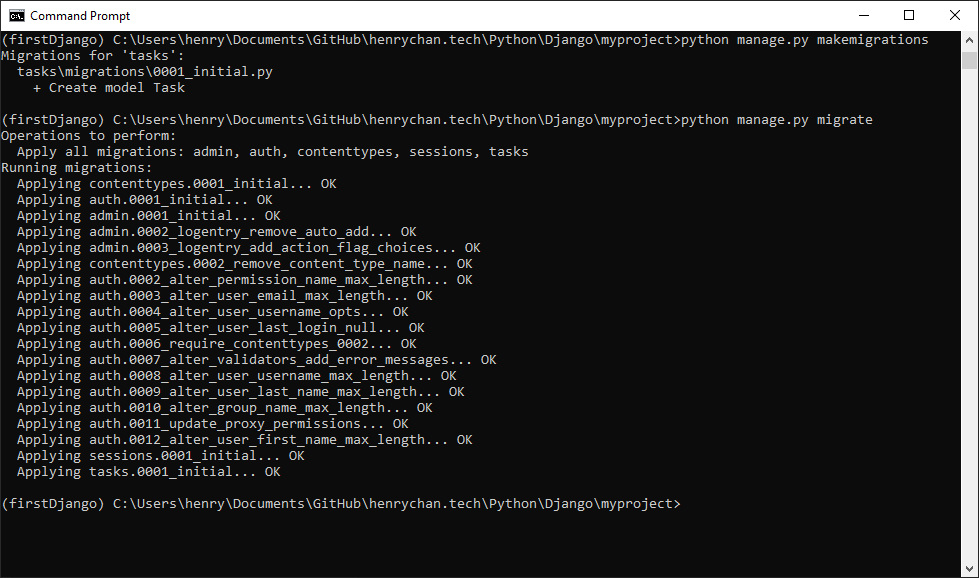
4.2 Run the following commands to apply the model to your database:
python manage.py makemigrations
python manage.py migrate
The makemigrations command tells Django to create new migration files based on the changes made to your models (e.g., adding a new field or creating a new model). A migration file records the changes required to update the database schema.
The migrate command applies the migration files to your database, effectively updating the database schema as per the changes defined in the migration files. According the out-of-the-box database settings in settings.py, django will create a sqlite3 local database in your project folder. Don’t forget to change the setting to a production grade database before launching your django app.
4.3 Open tasks/views.py and create a view to display tasks:
from django.shortcuts import render
from .models import Task

def task_list(request):
    tasks = Task.objects.all()
return render(request, 'tasks/task_list.html', {'tasks': tasks})Task.objects.all(): Fetches all tasks from the database.render: Renders the data to a template.
4.4 Create a new file tasks/urls.py and add the URL pattern:
from django.urls import path
from . import views

urlpatterns = [
    path('', views.task_list, name='task_list'),
]
4.5 Include this in the project’s urls.py:
from django.urls import path, include

urlpatterns = [
    path('admin/', admin.site.urls),
    path('tasks/', include('tasks.urls')),
]
4.6 Create a folder tasks/templates/tasks/ and add a file task_list.html:
<!DOCTYPE html>
<html>
<head>
    <title>Task List</title>
</head>
<body>
    <h1>Task List</h1>
    <ul>
        {% for task in tasks %}
            <li>{{ task.title }} - {% if task.completed %}Completed{% else %}Pending{% endif %}</li>
        {% endfor %}
    </ul>
</body>
</html>
4.7 Next, you can register the Model in Admin and Manage Tasks. Open tasks/admin.py and register the Task model:
from django.contrib import admin
from .models import Task

admin.site.register(Task)
This allows you to manage tasks via the Django admin panel. Let’s mangage the tasks in the admin panel
4.8 Run the following command in your project folder to create a superuser:
python manage.py createsuperuserEnter the username, email address (optional) and password when prompted.
4.9 Once the superuser is created, run the development server and you may login the admin site at http://127.0.0.1:8000/admin.
python manage.py runserverYou can now navigate to the “Tasks” section in the admin panel to view, add, edit and delete tasks.
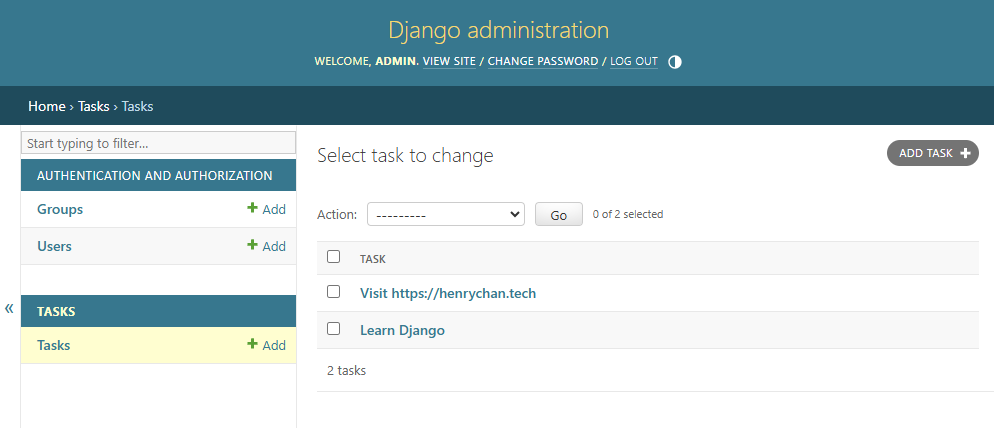
The admin interface provides a user-friendly way to manage your data directly from the browser, making it especially useful during development. This is out-of-the-box!
After creating some tasks in the admin panel, visit http://127.0.0.1/tasks to see your task list.
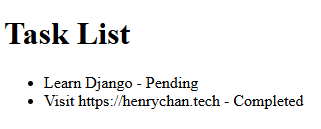
Now you’ve created a fully functional app that displays tasks from the database. From here, you can enhance the app with features like adding, updating, and deleting tasks.
If you have any questions or problems, feel free to create an issue in GitHub.
Fully tested source code can be cloned from
GitHub – https://github.com/henryphchan/henryc48.sg-host.com/tree/main/Python/Django/myproject