

When I first started building data models in Microsoft Fabric, one of the earliest questions I had was this:
“How can I safely share my Lakehouse tables without exposing everything to everyone?”
This is a real challenge for any data team. Imagine, we manage multiple data domains, each with different access rules. Some users should only see records for their department, while others shouldn’t see sensitive columns like salary, personal contact data, or product cost. So we needed something scalable, clean, and governed.
For a long time, we didn’t have a clean way to enforce this within the Lakehouse itself. Finally, OneLake security become Public Preview in October 2025. With this new feature, we can manage the Row-level Security (RLS) and Column-level Security (CLS) in Fabric Lakehouse.
Here are the steps to walk through the setup of the RLS and CLS in Fabric Lakehouse.
1. Preparing a Lakehouse for this demo
In your workspace, create a new Copy Job to copy one of the demo datasets from Microsoft. In this demo, the nyctaxi dataset will be used.
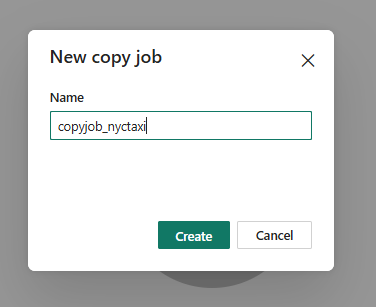
Setup the Copy Job to copy the nyctaxi data to a new Lakehouse. The lakehouse can be created during the copy process.
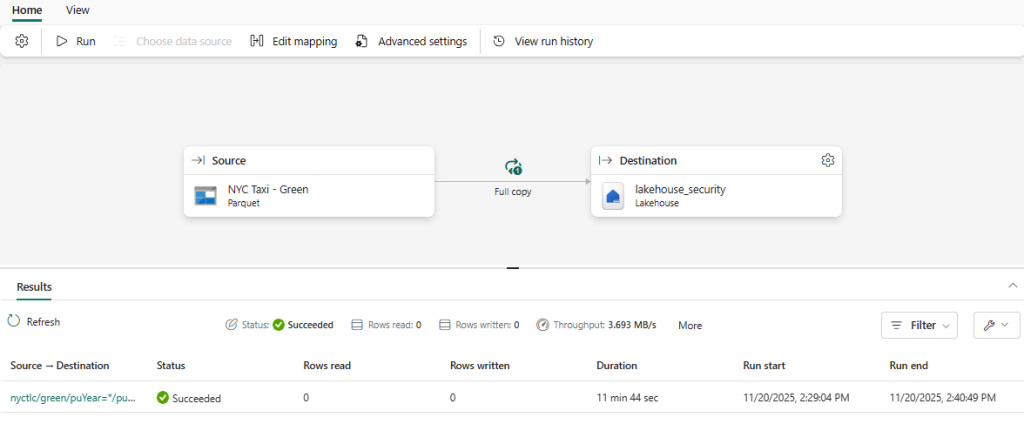
2. Manage Fabric Workspace level access
In your Fabric Workspace, add the users that you would like to enforce the OneLake security, add the user as “Viewer”. OneLake Security applies only to users accessing the Lakehouse as Viewer.
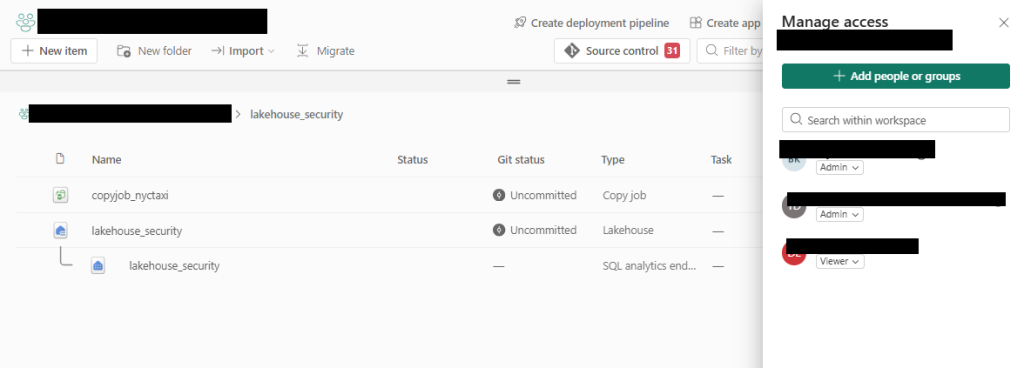
Admin, Member, and Contributor will bypass OneLake Security rules and can read and write all data in an item. Therefore, only Viewer role is supported by the OneLake Security.
Important notes in my testing
In my testing, If a user is granted access through an AD group, OneLake Security may not apply correctly. In some cases, users in AD groups cannot read the Lakehouse at all. For the most reliable behaviour, assign Admin, Member, Contributor and Viewer permissions directly to users, not groups.
3. Enabling OneLake Security
To enable the OneLake Security, you must be an Admin or Member in the Fabric Workspace. Open the lakehouse and you will see the “Manage OneLake security (preview)” in the menu bar.
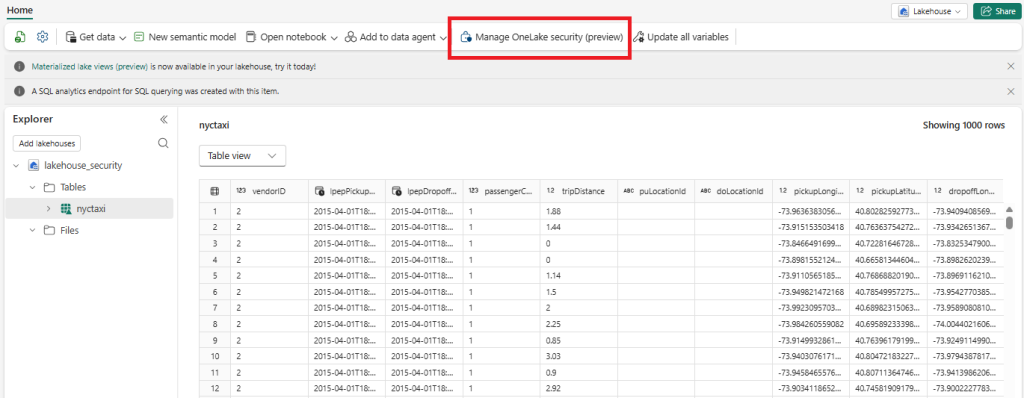
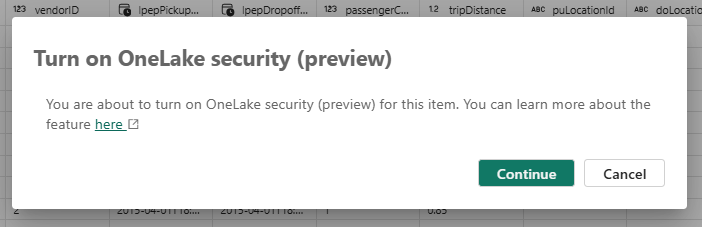
The OneLake security feature cannot be turned off once enabled. Review the dialogue box and click “Continue” to the next step.
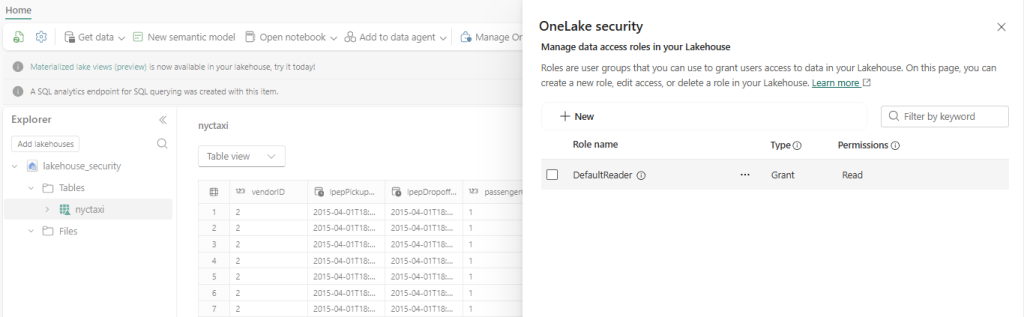
A DefaultReader role will be created automatically for all users with read permission to data.
4. Adding new Roles
In the “Manage OneLake Security” panel, click “New” to create new roles. In this demo, I would like to allow the users in this role to view a specific vendor in the nyctaxi table.
Name the role as “vendor1”.
In “Select Grant permissions”, only allow the user to “Read” the data
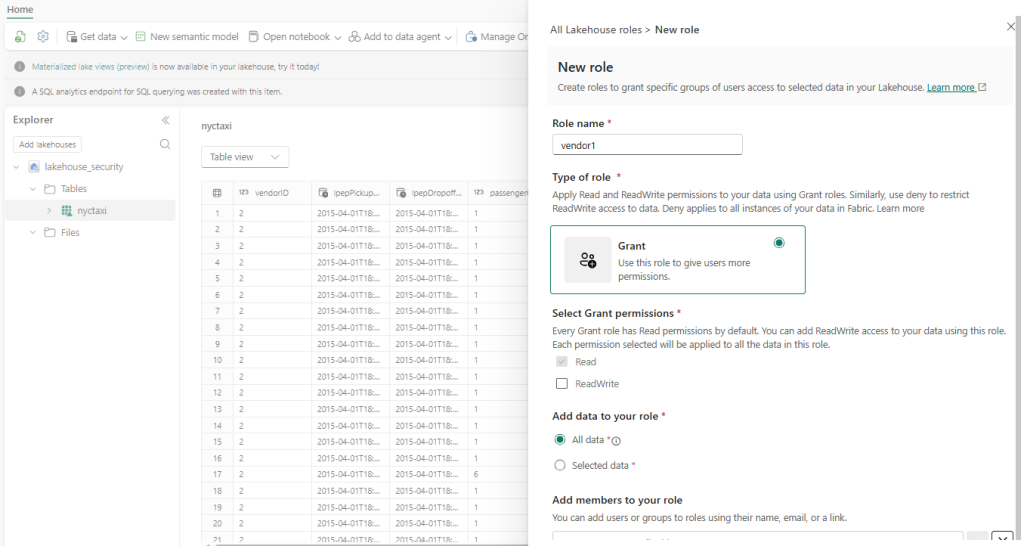
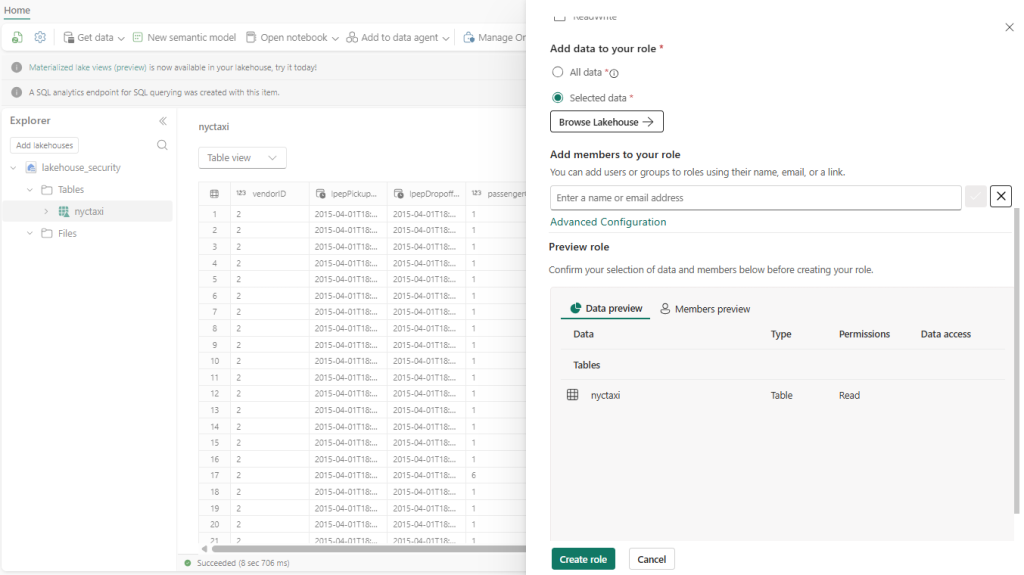
In “Add data to your role”, choose “Selected data” and use the “Browse Lakehouse” to choose the specific tables that allow to access in this role, e.g. nyctaxi
Then, add members to this role.
You can Preview the table and member list of this role in the “Preview role” section. Click “Create role” to create the new role.
You will see the new role in the OneLake security panel once it has been created successfully.
5. Setting up the RLS and CLS rules
RLS and CLS can only be enforced for Delta parquet table objects.
Click on the three dots “…” and choose “Permissions”. Select “Row security” to setup RLS.

Type the SQL statement for defining which rows you allow the role to see. In our case, I would only allow the users in this role to retrieve the vendor 1’s data, so the SQL will be:
SELECT * FROM nyctaxi WHERE vendorID = 1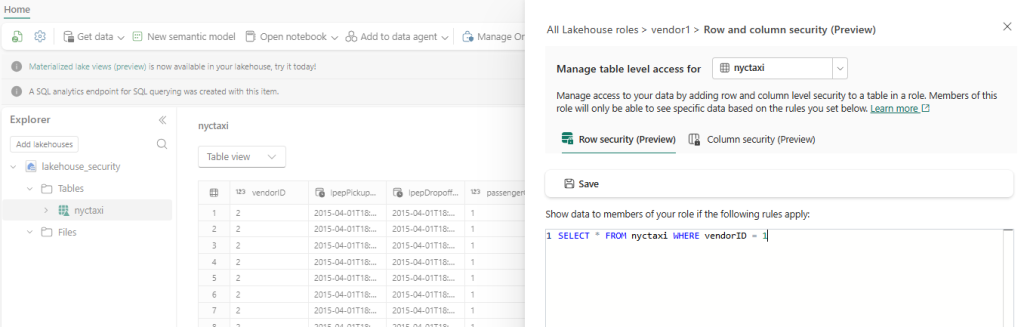
To understand the supported SQL syntax for RLS, please refer to the official document from Microsoft – Row-level security – Microsoft Fabric | Microsoft Learn.
Access to a table might be blocked if the RLS statement contains syntax errors that prevent it from being evaluated.
Save the rules if it has been created correctly.
For Column-level Security, open the Column security panel, then click “Enable CLS” to enable it.
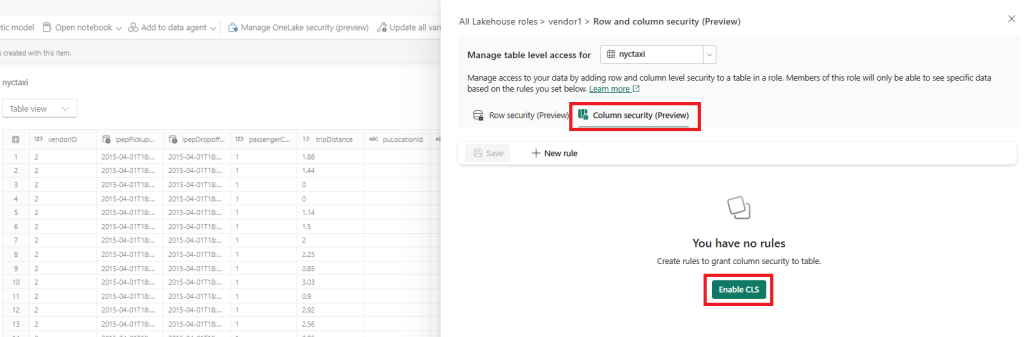
By default, all columns in the table will be allowed to read. Remove the columns that you don’t want to expose to the users in this role.
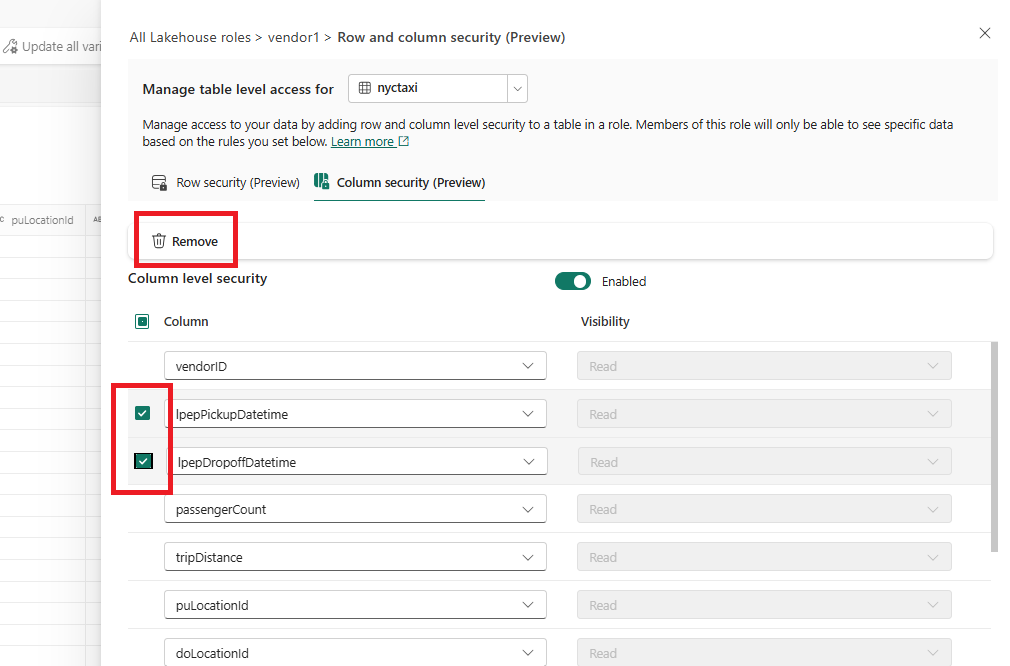
- CLS behaves differently across Fabric engines
- Spark notebooks:
SELECT *succeeds; hidden columns disappear automatically - SQL analytics Endpoint:
SELECT *fails if hidden columns exist; user must explicitly select allowed columns - Semantic models: Hidden columns are blocked and cannot be queried
- Spark notebooks:
6. Enabling OneLake security for SQL analytics endpoint
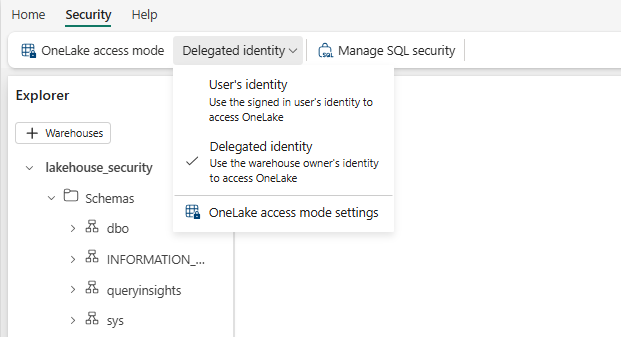
Before using the OneLake Security in SQL analytic endpoint, you must must change to the Security mode to “User’s identity mode”
Open the SQL analytic endpoint of the lakehouse in your Fabric workspace.
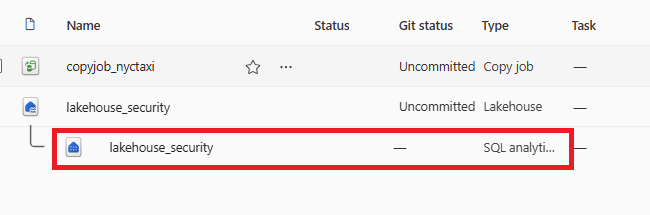
In the Security tab, change the OneLake access mode from Delegated identity to User’s identity.
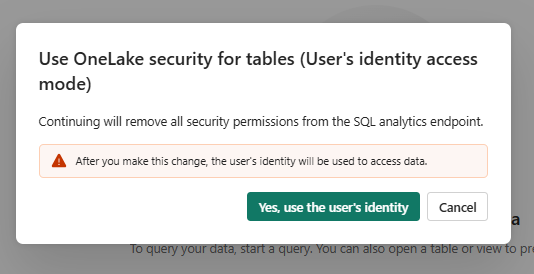
Review the messages in the prompt and click “Yes, use the user’s identity” to continue.
7. Testing out the security setup
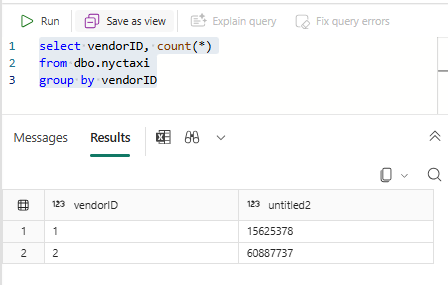
Continue to work on your Fabric workspace as Admin or Member. In the SQL analytic endpoint, run the following SQL:
select vendorID, count(*)
from dbo.nyctaxi
group by vendorIDYou would able to see the number of rows for vendor 1 and vendor 2 as you are the Admin or Member in this workspace.
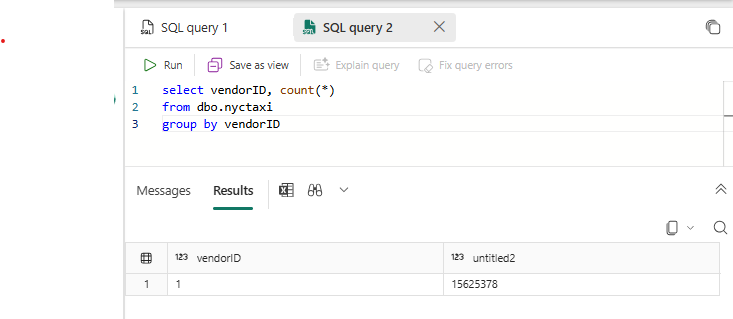
Login your Fabric workspace as an Viewer account and the account has been add to the “vendor1” role in the previous step. Run the same SQL in the SQL analytic endpoint.
You should only see the number of rows for vendor 1 only.
If you encountered an error related to deadlock, wait about 5 minutes and run the SQL again. The reason of deadlock is that the Fabric engine is updating the RLS and CLS rules that you just modified. In my testing, updating the rules may take 5 minutes to effective.
Key Takeaways
Here are the main points to remember when setting up RLS and CLS in Microsoft Fabric Lakehouse:
- Only Viewer role is affected by OneLake Security
- Admin, Member, and Contributor bypass all RLS/CLS rules.
- Direct user assignment is recommended
- Permissions granted through AD groups may not behave reliably in this preview.
- RLS and CLS apply only to Delta table objects
- And rules are configured through the Permissions panel for each table.
- SQL Analytics Endpoint must run in “User’s identity mode”
- Changes to RLS/CLS take up to 5 minutes to propagate
- Temporary deadlock errors are normal immediately after updates.